Do you want to learn how to upload video to WordPress? In this comprehensive guide, we will walk you through uploading a video to WordPress, ensuring your website visitors can enjoy your multimedia content seamlessly.
WordPress is a popular and powerful content management system that allows you to create and manage various websites, including blogs, business websites, and even multimedia-rich platforms. One of the key features of WordPress is its ability to handle video content effortlessly.
How To Upload Video To WordPress
Step 1: Prepare Your Video
Before uploading a video to your WordPress website, it’s important to ensure that it is in the appropriate format and optimized for web playback. Consider following these best practices:
- Format: WordPress supports a range of video formats, including MP4, M4V, MOV, WMV, AVI, and FLV. It is recommended to use the MP4 format, as it offers a good balance between quality and file size.
- Compression: Compress your video to reduce file size without compromising quality. Various video editing software and online tools, such as HandBrake and Adobe Media Encoder, can help you achieve this.
- Resolution: Opt for an appropriate resolution that balances visual quality with loading time. It’s recommended to use a resolution of 1280×720 (720p) or lower, especially for web playback.
Step 2: Accessing the WordPress Media Library
To upload a video, you need to access the Media Library in your WordPress dashboard. Follow these steps:
- Log in to your WordPress admin panel.
- Navigate to the left-hand menu and click on “Media” and then “Library.”
Step 3: Uploading the Video
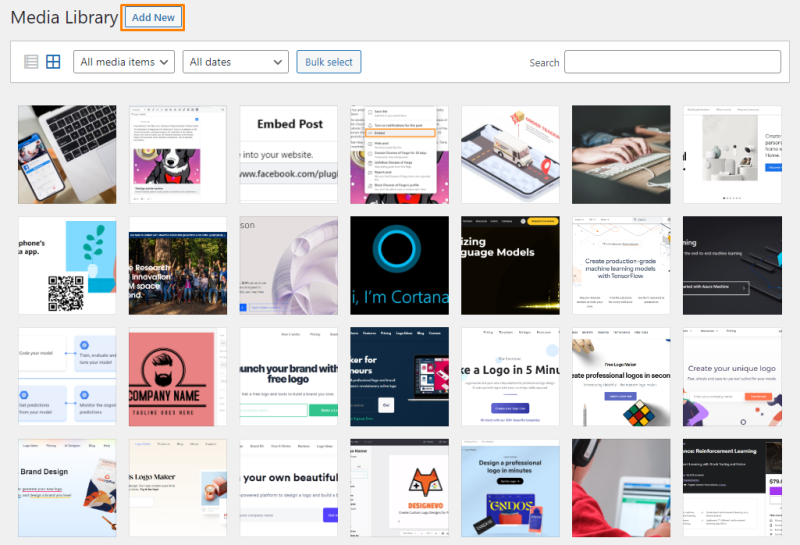
Now that you are in the Media Library, you can proceed with uploading your video:
- Click on the “Add New” button.
- You will see two options: “Upload Files” and “Media Library.” Choose “Upload Files.”
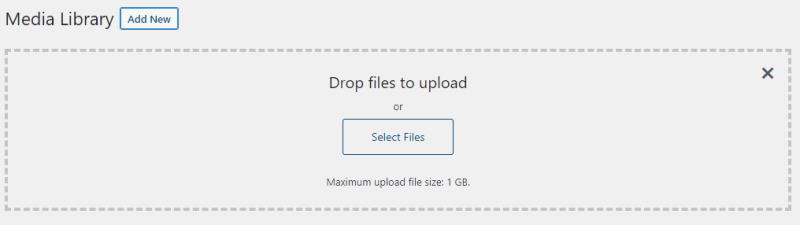
- Click on the “Select Files” button and locate the video file on your computer.
- Once selected, the upload will begin automatically. You will see a progress bar indicating the upload status.
Step 4: Adding Video Details and Metadata
After the video upload is complete, it’s important to provide additional details and metadata to optimize the video’s display and accessibility: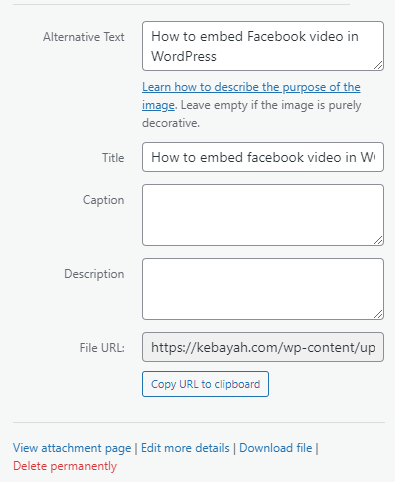
- Title: Enter a descriptive title for your video.
- Description: Add a brief description that provides context or information about the video.
- Captions/Subtitles: If your video includes captions or subtitles, you can add them in the respective field.
- Thumbnail: Choose or upload a thumbnail image that represents your video. This image will be displayed before the video is played.
Step 5: Inserting the Video in Your Content (Block Editor)
Now that your video is uploaded and its details are in place, you can embed it within your WordPress content:
- Edit or create a new post or page where you want to insert the video.
- Place the cursor at the desired location within your content.
- Click on the “Add Block” button (+) or the “+” icon that appears when you hover between blocks.
- In the block editor, search for “Video” or find it under the “Common Blocks” category.
- Select the “Video” block, and a new block will be added to your content.
- Within the video block, you will find options to upload, select, or enter the URL of the video.
- Choose the “Media Library” option, select your video, and click on the “Insert” button.
Step 6: Publishing and Testing
Once you have inserted the video into your content, it’s time to publish your post or page and test the video playback:
- Click on the “Publish” button to make your post or page live.
- Visit your website as a regular visitor to ensure the video is displayed correctly and functions as expected.
- Check the video on different devices and browsers to ensure cross-compatibility.
Conclusion
Adding video content to your WordPress website enhances user engagement and provides an effective medium for conveying information. By following this comprehensive guide, you can confidently upload videos to WordPress, ensuring they are optimized, properly displayed, and accessible to your website visitors. Embrace the power of multimedia and take your WordPress website to the next level!
See Also