
Are you searching on how to add dark mode to your WordPress website? This guide will walk you through the simple steps needed to add dark mode to your WordPress website.
Dark mode has gained tremendous popularity in recent years due to its stylish look and decreased eye strain, particularly during night-time browsing. It’s not just an aesthetic choice, it’s also a practical one. As a website owner, you can allow your users to switch between light and dark mode, enhancing their browsing experience and potentially increasing their time spent on your site. If your website is built on WordPress, implementing this feature is quite straightforward.
Prerequisites
Before you proceed, ensure you have:
- A WordPress website
- Administrator access to the WordPress dashboard
How to Add Dark Mode to Your WordPress Website
Without further ado, let’s dive into the process!
Step 1: Choosing a Dark Mode Plugin
The easiest way to add dark mode to your WordPress website is by using a plugin. There are several plugins available that can effectively help you introduce this feature. Here are a few top-rated ones to consider:
- WP Dark Mode
- Night Mode for WordPress
- Dark Mode by WPPOOL
Each of these plugins offers a set of unique features, so you can select the one that best aligns with your needs.
Step 2: Installing and Activating the Plugin (Dark Mode by WPPOOL)
 After choosing a suitable dark mode plugin, the next step is installing it. Here’s how:
- Log into your WordPress dashboard.
- Navigate to ‘Plugins > Add New’.
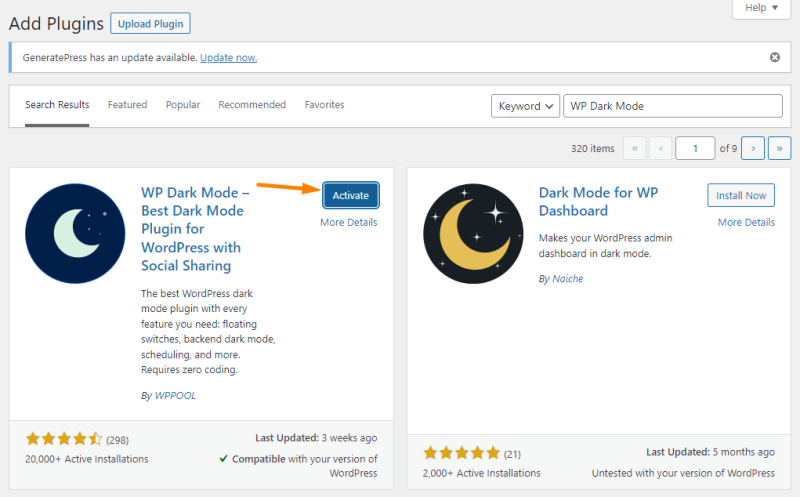
- In the search box, type the name of your chosen plugin. (Dark Mode by WPPOOL)
- Once found, click ‘Install Now’.
- After installation, click ‘Activate’.
The plugin is now active and ready to be configured.
Step 3: Configuring the Plugin
- In your WordPress dashboard, go to ‘Settings > Dark Mode Settings’ (or similar).
- Here, you can customize various settings like dark mode color scheme, timing (if you want dark mode to automatically turn on at a certain time), etc.
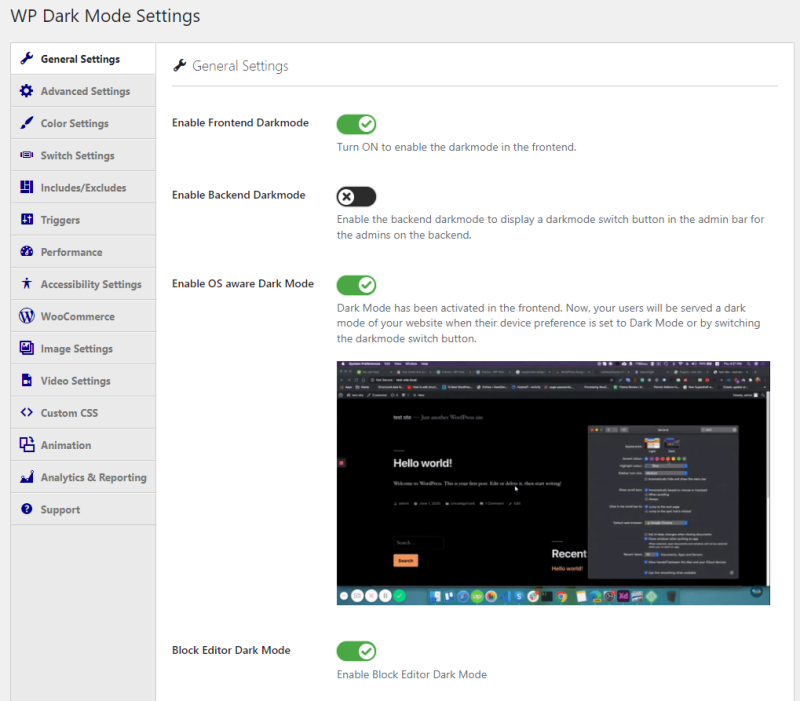
- After adjusting the settings to your preference, remember to save your changes.
Now, visit your website and check how the dark mode looks. Make sure to also check the toggle switch (if you enabled it) to see if the transition between modes is smooth.
Step 4: Making Design Adjustments
While the plugin will do most of the work in switching your site to dark mode, there may be some elements that don’t translate perfectly. For instance, certain colors may clash, or specific images might not display well against a dark background.
In this case, you’ll need to make some design adjustments to ensure all your content is easily readable and visually appealing in both light and dark mode. Check your site thoroughly and tweak design elements as needed.
Step 5: Testing
![]() The final step is testing the implementation across different devices and browsers to ensure a seamless experience for all users. Don’t forget to check the functionality on mobile devices, as a significant portion of web traffic comes from mobile users.
The final step is testing the implementation across different devices and browsers to ensure a seamless experience for all users. Don’t forget to check the functionality on mobile devices, as a significant portion of web traffic comes from mobile users.
 Remember, providing a dark mode option should enhance the user experience, not complicate it. If users encounter difficulties when trying to switch between modes, or if elements of your site are difficult to read in dark mode, it could detract from their experience and engagement.
Conclusion
Adding a dark mode to your WordPress website not only improves its aesthetics but also makes it more user-friendly, catering to those who prefer a darker theme, especially for night-time browsing. The process is simple and can be easily accomplished using the right plugin. By following these easy steps, you can provide a dark mode option to your users and give your website a modern and stylish touch.
See Also